Find this option in the main menu of DriveEZ, designed to help you manage multiple branches of your driving school efficiently.
Users would be able to view the number of branches added to the system in the list view.
Upon selecting any specific Branch name, you will be able to view the details of the branch. .
View Listing Screen On the screen it displays a list of all branches of the institution.
This interface allows administrators to view, manage, and take actions on all the branches of their institution. Each row represents a branch and displays its associated details such as contact info, status, and activity metrics. It also provides quick access to edit, delete, email, and message options per branch.
Branch Name: Name of the branch (clickable for more details).
Email: Email address associated with the branch.
Contact: Phone number/contact for the branch.
Status: Indicates if the branch is Active.
Active Students: Number of active students at the branch.
Active Instructors: Number of active instructors at the branch.
Active Staff: Number of non-instructor staff members active at the branch.
Vehicles: Number of vehicles associated with the branch.
Action: Quick action buttons for:
Edit
Delete
Email
Message
Edit Branch
On the branch listing screen’s upon selecting the edit icon from the Action column user would be redirected to the Edit Form page.
On the Edit Branch From, you can edit the branch details.
Save: Click “Save” after verifying all the information for accuracy. This will update the branch details and redirect you back to the branch listing screen.
Delete Branch
On the branch listing screen’s upon selecting the delete icon from the Action column user would be able to view the delete pop-up.
This action allows users to view a confirmation popup displayed before permanently deleting a branch in the system. It serves as a final warning to the user before performing an irreversible action.
If user selects the continue button, the branch will get deleted from the system.
If user selects the Cancel button, it will identify to abort the deletion and return to the previous screen.
Add a New Branch
Locate and click the “Add Branch” button, usually positioned at the top right of the Branch Management section. A form for new branch details will appear.
Fill Out Branch Details
Accurately complete the form with the branch’s information:
Upon clicking the Add Branch button, users will be presented with a form containing the following fields and corresponding details:
Branch Name: Enter Unique name to identify the Branch.
Email Address: Enter your email address to the branch.
Phone Number: Enter your primary contact number.
Address: Enter the physical location of the branch.
Map Location: Enter Map location with the URL.
Tax Number: Enter the Tax number of the Branch
Status: You can mark the status as active or inactive of the branch.
Switch Between Branches
To manage or view specific branch details, use the branch selector at the top of the Branch Management screen. Selecting a different branch will refresh the page to display information pertinent to that branch.
Filter & Search Branch
Upon selecting the Filter & search option from the header bar allows users to view and filter the branch data based on various statuses.
Status Dropdown: Allows selection of branch status (e.g., Active, Inactive, All).
Search Button: Applies the selected status filter and displays matching branches.
Clear Button: Resets the filter, showing all branches regardless of status.
Video Tutorial
Course Management
Users can access the Courses option from the main menu in DriveEZ, This section allows for the oversight and management of the Courses. List View
Users would be able to view the number of Courses added to the system in the list view.
Upon selecting any specific Course name, you will be able to view the details of the Course.
Grid View
Users would be able to view the number of courses added to the system in the grid view.
View Listing Screen
On the screen it displays a list of all Courses.
This interface enables administrators to view, manage, and take action on all instructors associated with the platform. Each row represents an instructor and displays key information including:
This interface enables administrators to view, manage and take action on all courses associated with the platform. Each row represents an course and displays key information including following:
Course Name: The title of each driving course
Package: Details about class hours (Practical and Theory)
Price: The cost of each course
Registered Students: Number of students enrolled
Status: All shown as “Avoidable” (likely meaning “Available”)
Action: Includes icons to Manage, Edit, Share and Delete the Course.
1.7.1.1 Filter & Search
Search by Name, Email or Phone Number: A text box where users can type part or full details of a Course name, email, or phone number to search.
Course Type: A dropdown field that lets the user filter course based on their type.
Status: Another dropdown to filter based on the account status of Courses.
View Course
Upon selecting the Course name from the listing screen, users would be able to view the detail information about the course.
1.7.3 Add Course
Click on the “Add Course” button located at the top right corner of the screen. This action initiates the process to create a new course offering.
Uses would need to enter the following details:
Upload Course Image: Select ‘Choose File’ to upload a relevant image for the course. Ensure the image is clear and professionally represents the course content.
Course Name: Enter a unique name for the course.
Description: Provide a comprehensive overview of what the course entails, including objectives and outcomes.
Price: Set the course fee.
On-Road Hours: Specify the total number of practical driving hours included.
Theory Class Hours: Indicate the number of hours dedicated to theoretical knowledge.
Availability: Choose whether the course is currently available for enrollment.
Create the Course: Review all entered details for accuracy. Once satisfied, click the “Create Course” button to officially add the course to your offerings. This course will now be visible to branches and eligible for student registration.
1.7.4 Edit Course
Click on the Edit Icon located at the listing screen of the course. This action initiates the process to edit the course.
1.7.5 Share Catalogue
Click on the share catalogue icon located at the listing screen of the course. This action will allow user to share the catalogue.
Video Tutorial
Staff Management
Access Staff Management
From the DriveEZ main dashboard, click on the “Staff Management” option to view all staff members and access management tools.
View Listing Screen On the screen it displays a list of all Staff Members.
This interface allows administrators to view, manage, and take actions on all the staff members of the Driveez. Each row represents a staff and displays its associated details such as First name, last name, display name, role, branch name, phone number, permissions, and Status, It also provides quick access to edit and view profile options per staff.
First Name / Last Name / Display Name – Basic identity details of each staff member.
Role – Shows the assigned role (e.g., Admin, Instructoradmin, staff).
Branch Name – Indicates the branch to which the staff belongs.
Phone Number – Contact information of the staff member
Permissions – Actions that can be performed by/for the staff (e.g., View, Edit & Delete).
Status – Shows current status (e.g. Active/Inactive).
Action – Icons to edit or view details of the staff member.
View Staff Profile Upon selecting the View Profile icon from the listing screen, it will redirect admin to view the staff profile.
Notes Displays a table with columns: Category, Sent At, Note By, Note To, Note, and Action.
Add Note It is designed for creating and submitting notes.
Write Note: Admin can enter the note content in the provided text box.
Post Note: Clicking this will likely save the note to the system and make it visible in the Notes section of the dashboard
Documents Lists files with columns: Name, Uploaded By, Date, and Action.
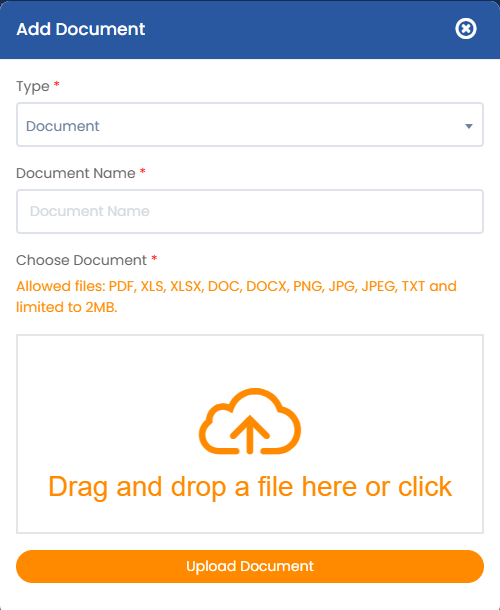
Upload Document It is designed for Uploading documents.
Type: Users need to specify the type of the document
Document Name: A text field to name the document
View Account Info
On the Account Info section, which provides an overview of the account details including following
Display Name
First Name
Last Name
Permissions
Email
Branch
Language
1.2.1.1.5 View Activity
On the Activity section, you will be able to view the activity of the staff.
1.2.2 Export Options
Excel and CSV buttons allow exporting the branch data for offline use or reporting.
1.2.3 Filter and Search
It is being used for filtering and searching staff records based on specific criteria.
Search by Name, Email or Phone Number: A text box where users can type part or full details of a staff member’s name, email, or phone number to search.
Branch: A dropdown field that lets the user filter staff based on the office or branch location.
Status: Another dropdown to filter based on the employment or account status of staff members.
Role: A dropdown to filter staff based on their role in the organization (e.g., Admin, Manager, Employee, etc.).
1.2.4 Add New Staff
Locate and select the “Add Staff” button which is situated on the top right corner. You will be able to view the Form for new staff details.
Upon clicking the Add Staff button, users will be presented with a form containing the following fields and corresponding details:
First Name: Text field to enter the staff member’s first name.
Last Name: Text field to enter the staff member’s last name.
Display Name: Enter a preferred name for internal displays.
Email Address: Email input field. This will be used for login and communication.
Initial Password: Set a temporary password for first-time login.
Phone Number and Address: Contact details for the staff member.
Role Assignment: Choose between “Administrator” or “Staff” roles.
Permissions: Select the appropriate level of access: “Read, Write, Delete”, “Read and Write”, or “Read Only”.
Profile Picture Upload: Drag-and-drop or click-to-upload interface for staff profile image.
Emergency Contact Name: Person to contact in case of emergencies.
Emergency Contact Phone: Phone number of the emergency contact person.
Save: After ensuring all information is correct and complete, click “Save” to add the new staff member to the system. An email with login credentials will be automatically sent to the new staff member.
Video Tutorial
Fleet Management
Users can access the Fleet option from the main menu in DriveEZ, This section allows for the oversight and management of the driving school’s vehicle fleet.
Users would be able to view the number of fleets added to the system in the list view.
View Listing Screen
On the screen it displays a list of all Fleets.
This interface allows administrators to view and manage the driving school’s vehicle fleet at the headquarters. Each row represents a vehicle and displays the following key details:
Vehicle Type: Model/make of the vehicle (e.g., Honda City, BMW SSeries).
Vehicle No: Internal identification number for the vehicle (e.g., #678802).
Plate: License plate number (e.g., XJF123).
M. Year: Manufacturing year of the vehicle (e.g., 1869, 2024).
Instructor: Name of the assigned instructor or “Un-Assigned” if no instructor is linked.
Action: Includes icons to edit or delete the fleet’s profile.
Export Options
Excel and CSV buttons allow exporting the branch data for offline use or reporting.
Edit Vehicle
On the fleet listing screen’s upon selecting the edit icon from the Action column user would be redirected to the Edit Form page to modify the details of a specific vehicle.
On the Edit vehicle From, you can edit the branch details.
Save: Click “Save changes” after verifying all the information for accuracy. This will update the vehicle details and redirect you back to the fleet listing screen.
Delete Fleet
On the fleet listing screen, upon selecting the delete icon from the Action column user would be able to view the delete pop-up.
This action allows users to view a confirmation popup displayed before permanently deleting a fleet in the system. It serves as a final warning to the user before performing an irreversible action.
If the user selects the continue button, the fleet will get deleted from the system.
If user selects the Cancel button, it will identify to abort the deletion and return to the previous screen.
Add Vehicle
Locate and select the “Add Vehicle” button which is situated on the top right corner. You will be able to view the Form for new vehicle details.
Upon clicking the Add Vehicle button, users will be presented with a form containing the following fields and corresponding details:
Vehicle no: A unique identifier for the vehicle
Number Plate: Enter the vehicle’s license plate number.
Make: The manufacturer/brand of the vehicle.
Model: The specific model of the vehicle.
Model Year: Enter the Model year of the vehicle
Assigned Instructor: Allows assigning an instructor to the vehicle..
Save: Review all entered details for accuracy. Click “Add Vehicle” to save the new vehicle to your fleet database. This action makes the vehicle available for class scheduling and instructor assignment.
Video Tutorial
Instructor Management
Users can access the instructor option from the main menu in DriveEZ, This page shows all current instructors and options for adding new ones.
List view
Users would be able to view the number of instructors added to the system in the list view.
Upon selecting any specific instructor name, you will be able to view the details of the instructors.
Grid View
Users would be able to view the number of staff members added to the system in the grid view.
View Listing Screen
On the screen it displays a list of all Staff Members.
This interface enables administrators to view, manage, and take action on all instructors associated with the platform. Each row represents an instructor and displays key information including:
First Name / Last Name / Display Name: Basic identification details of each instructor.
Email: Contact email for communication.
Contact: Instructor’s phone number.
Status: Displays the current status of the instructor (e.g., Active).
Availability: Indicates whether the instructor is currently available
Action: Includes icons to edit or view the instructor’s profile.
View Instructor Profile
Upon selecting the First name or the last name from the listing screen user will be redirected to view the instructor profile.
Right Profile Section:On the right side of the screen, you can view the two tabs including Account info and Activity.
Account Info: On the Account Info section, which provides an overview of the account details including following
Display Name
First Name
Last Name
Permissions
Email
Branch
Language
Activity: On the Activity section, you will be able to view the activity of the staff.
Calendar View: Displays a schedule with time slots and what appear to be numeric values.
Shows appointments/times for specific date. Upon selecting it, it will show the details of the session.
The calendar can be customized to display by month, week, or day.
View Schedules of Instructor
Clicking the calendar icon in the Action column on the Instructor Listing screen allows users to view the individual instructor’s schedule as shown below:
This interface enables administrators to view, manage, and take action on all schedules associated with the instructor. Each row represents an instructor and displays key information including:
Session Name: Name of the driving session
Dates: Date range for the session
Duration: Start and end time of session
Instructor: Instructor assigned
Class Type: On-Road or Theory
Created By: Who created the session (Instructor/Student)
Actions: View, Edit, Delete icons where applicable
Edit Schedules
This will allow users to Edit the schedules of the instructor. Below is a breakdown of its key functionalities:
Session Name: Name of the driving session
Class Type: selection between Theory Class (classroom-based learning) or On-Road Class (practical training)
Date and Time:
Start Date & End Date: Defines the session’s duration (here, a single day: 17 April, 2025).
Time Slot: Dropdown or input for session duration (e.g., 1.15 hour).
Occurrence (Required): Options to set recurrence:
All weekday (every weekday)
Specific weekday (user selects days, e.g., Thursday)
Weekend (Saturday/Sunday)
Checkboxes for manual day selection.
Location: Text field for the session’s location (e.g., India).
Map URL: An optional field to link to a map (e.g., Google Maps) for directions.
Instructors: Dropdown or search to assign an instructor (e.g., Test Inst Two).
Students: Field to enroll students (e.g., test paid fv—likely a placeholder).
Slots Detail (Summary): Displays a confirmation section with Date and Time Slot
Delete Schedules
Upon selecting the delete icon from the Action column they will be able to view the delete pop-up.
Yes: If you select yes from the pop-up the record will get deleted.
No: If you select No from the Pop-up the record will get deleted accordingly.
Export Options
Excel and CSV buttons allow exporting the branch data for offline use or reporting.
Add New Instructor
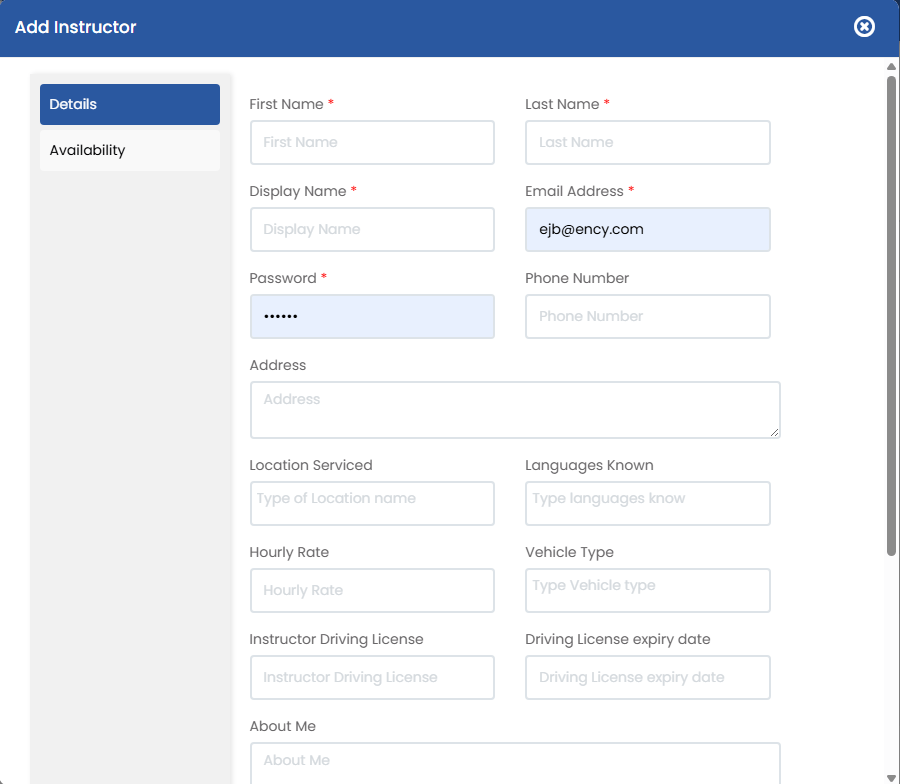
Select the “Add Instructor” button located at the top right. A form will appear to input the instructor’s details:
Complete the form with the instructor’s information:
First and Last Name: The instructor’s legal name.
Display Name: How the instructor’s name will appear within the system.
Email Address: Used for login and notifications.
Password: Set an initial password for account access.
Phone Number and Address: Contact information.
Location Serviced: area or branch the instructor will serve
Hourly Rate: instructor’s pay rate
Instructor Driving License: license number or verification
Driving License Expiry Date: to ensure validity
About Me: Description or bio for students
Profile Picture: upload option for instructor identification
Ensure all data is accurate for effective communication and scheduling.
Users can access the instructor option from the main menu in DriveEZ, This page shows all current instructors and options for adding new ones.
View Listing Screen
On the screen it displays a list of all Staff Members.
This interface enables administrators to view, manage, and take action on all instructors associated with the platform. Each row represents an instructor and displays key information including:
First Name / Last Name / Display Name: Basic identification details of each instructor.
Email: Contact email for communication.
Contact: Instructor’s phone number.
Status: Displays the current status of the instructor (e.g., Active).
Availability: Indicates whether the instructor is currently available
Action: Includes icons to edit or view the instructor’s profile.
View Instructor Profile
Upon selecting the First name or the last name from the listing screen user will be redirected to view the instructor profile.
Right Profile Section:On the right side of the screen, you can view the two tabs including Account info and Activity.
Account Info: On the Account Info section, which provides an overview of the account details including following
Display Name
First Name
Last Name
Permissions
Email
Branch
Language
Activity: On the Activity section, you will be able to view the activity of the staff.
Calendar View: Displays a schedule with time slots and what appear to be numeric values.
Shows appointments/times for specific date. Upon selecting it, it will show the details of the session.
The calendar can be customized to display by month, week, or day.
View Schedules of Instructor
Clicking the calendar icon in the Action column on the Instructor Listing screen allows users to view the individual instructor’s schedule as shown below:
This interface enables administrators to view, manage, and take action on all schedules associated with the instructor. Each row represents an instructor and displays key information including:
Session Name: Name of the driving session
Dates: Date range for the session
Duration: Start and end time of session
Instructor: Instructor assigned
Class Type: On-Road or Theory
Created By: Who created the session (Instructor/Student)
Actions: View, Edit, Delete icons where applicable
Edit Schedules
This will allow users to Edit the schedules of the instructor. Below is a breakdown of its key functionalities:
Session Name: Name of the driving session
Class Type: selection between Theory Class (classroom-based learning) or On-Road Class (practical training)
Date and Time:
Start Date & End Date: Defines the session’s duration (here, a single day: 17 April, 2025).
Time Slot: Dropdown or input for session duration (e.g., 1.15 hour).
Occurrence (Required): Options to set recurrence:
All weekday (every weekday)
Specific weekday (user selects days, e.g., Thursday)
Weekend (Saturday/Sunday)
Checkboxes for manual day selection.
Location: Text field for the session’s location (e.g., India).
Map URL: An optional field to link to a map (e.g., Google Maps) for directions.
Instructors: Dropdown or search to assign an instructor (e.g., Test Inst Two).
Students: Field to enroll students (e.g., test paid fv—likely a placeholder).
Slots Detail (Summary): Displays a confirmation section with Date and Time Slot
Delete Schedules
Upon selecting the delete icon from the Action column they will be able to view the delete pop-up.
Yes: If you select yes from the pop-up the record will get deleted.
No: If you select No from the Pop-up the record will get deleted accordingly.
1.3.1.1.4 Export Options
Excel and CSV buttons allow exporting the branch data for offline use or reporting.
1.3.2 Add New Instructor
Select the “Add Instructor” button located at the top right. A form will appear to input the instructor’s details:
Complete the form with the instructor’s information:
First and Last Name: The instructor’s legal name.
Display Name: How the instructor’s name will appear within the system.
Email Address: Used for login and notifications.
Password: Set an initial password for account access.
Phone Number and Address: Contact information.
Location Serviced: area or branch the instructor will serve
Hourly Rate: instructor’s pay rate
Instructor Driving License: license number or verification
Driving License Expiry Date: to ensure validity
About Me: Description or bio for students
Profile Picture: upload option for instructor identification
Ensure all data is accurate for effective communication and scheduling.
Users can access the instructor option from the main menu in DriveEZ, This page shows all current instructors and options for adding new ones.
List view
Users would be able to view the number of instructors added to the system in the list view.
Upon selecting any specific instructor name, you will be able to view the details of the instructors.
Grid View
Users would be able to view the number of staff members added to the system in the grid view.
1.3.1 View Listing Screen
On the screen it displays a list of all Staff Members.
This interface enables administrators to view, manage, and take action on all instructors associated with the platform. Each row represents an instructor and displays key information including:
First Name / Last Name / Display Name: Basic identification details of each instructor.
Email: Contact email for communication.
Contact: Instructor’s phone number.
Status: Displays the current status of the instructor (e.g., Active).
Availability: Indicates whether the instructor is currently available
Action: Includes icons to edit or view the instructor’s profile.
1.3.1.1 View Instructor Profile
Upon selecting the First name or the last name from the listing screen user will be redirected to view the instructor profile.
Right Profile Section:On the right side of the screen, you can view the two tabs including Account info and Activity.
Account Info: On the Account Info section, which provides an overview of the account details including following
Display Name
First Name
Last Name
Permissions
Email
Branch
Language
Activity: On the Activity section, you will be able to view the activity of the staff.
Calendar View: Displays a schedule with time slots and what appear to be numeric values.
Shows appointments/times for specific date. Upon selecting it, it will show the details of the session.
The calendar can be customized to display by month, week, or day.
1.3.1.1 View Schedules of Instructor
Clicking the calendar icon in the Action column on the Instructor Listing screen allows users to view the individual instructor’s schedule as shown below:
This interface enables administrators to view, manage, and take action on all schedules associated with the instructor. Each row represents an instructor and displays key information including:
Session Name: Name of the driving session
Dates: Date range for the session
Duration: Start and end time of session
Instructor: Instructor assigned
Class Type: On-Road or Theory
Created By: Who created the session (Instructor/Student)
Actions: View, Edit, Delete icons where applicable
1.3.1.1.2 Edit Schedules
This will allow users to Edit the schedules of the instructor. Below is a breakdown of its key functionalities:
Session Name: Name of the driving session
Class Type: selection between Theory Class (classroom-based learning) or On-Road Class (practical training)
Date and Time:
Start Date & End Date: Defines the session’s duration (here, a single day: 17 April, 2025).
Time Slot: Dropdown or input for session duration (e.g., 1.15 hour).
Occurrence (Required): Options to set recurrence:
All weekday (every weekday)
Specific weekday (user selects days, e.g., Thursday)
Weekend (Saturday/Sunday)
Checkboxes for manual day selection.
Location: Text field for the session’s location (e.g., India).
Map URL: An optional field to link to a map (e.g., Google Maps) for directions.
Instructors: Dropdown or search to assign an instructor (e.g., Test Inst Two).
Students: Field to enroll students (e.g., test paid fv—likely a placeholder).
Slots Detail (Summary): Displays a confirmation section with Date and Time Slot
1.3.1.1.3 Delete Schedules
Upon selecting the delete icon from the Action column they will be able to view the delete pop-up.
Yes: If you select yes from the pop-up the record will get deleted.
No: If you select No from the Pop-up the record will get deleted accordingly.
1.3.1.1.4 Export Options
Excel and CSV buttons allow exporting the branch data for offline use or reporting.
1.3.2 Add New Instructor
Select the “Add Instructor” button located at the top right. A form will appear to input the instructor’s details:
Complete the form with the instructor’s information:
First and Last Name: The instructor’s legal name.
Display Name: How the instructor’s name will appear within the system.
Email Address: Used for login and notifications.
Password: Set an initial password for account access.
Phone Number and Address: Contact information.
Location Serviced: area or branch the instructor will serve
Hourly Rate: instructor’s pay rate
Instructor Driving License: license number or verification
Driving License Expiry Date: to ensure validity
About Me: Description or bio for students
Profile Picture: upload option for instructor identification
Ensure all data is accurate for effective communication and scheduling.
Save: After ensuring all information is correct and complete, click “Save” to add the new instructor to the system.
Video Tutorial
Student Management
Users can access the Student option from the main menu in DriveEZ, This section allows for the oversight and management of the Students.
List View
Users would be able to view the number of students added to the system in the list view.
Upon selecting any specific student name, you will be able to view the details of the student.
Grid View
Users would be able to view the number of students added to the system in the grid view.
1.5.1 View Listing Screen
On the screen it displays a list of all Students.
This interface enables administrators to view, manage, and take action on all instructors associated with the platform. Each row represents an instructor and displays key information including:
Name: The student’s full name
Display Name: Abbreviated version of the name
Course: Number appears to represent courses taken
Email: Student’s email address
Contact: Phone number
Status: Current account status (“Active” or “Registered”)
Action: Includes icons to edit or view the Student’s profile.
1.5.1.1 Filter & Search
It is being used for filtering and searching student records based on specific criteria.
Search by Name, Email or Phone Number: A text box where users can type part or full details of a student’s name, email, or phone number to search.
Branch: A dropdown field that lets the user filter students based on the branch location.
Status: Another dropdown to filter based on the account status of students.
1.5.1 View Student Profile
Upon selecting the Profile icon from the Action column from the listing screen user will be redirected to view the student profile.
Users will be able to view the following details on the student profile:
Button: Add Course – Allows admin to assign a new course.
1.5.1.1.1Add Course
Upon selecting the Add course button, users would be able to view the below pop-up:
Course: Select the course name from the dropdown menu.
Add Course: The selected course will get added in the student profile.
1.5.1.2 Session Calendar
Session Calendar:
Views Available: List | Calendar
Color Codes:
Green = On Road
Blue = Theory
Grey = Complete
Month Navigation: Navigate between months
Buttons:
Export: Export session data
Add Session: Schedule a new class/session
1.5.1.2.1 Add Session
Upon selecting the Add Session button user will be able to view the Add Session form as below:
Upon clicking the Add Session button, users will be presented with a form containing the following fields and corresponding details:
Session Name: A text field to enter the name/title of the session.
Class Type: Users can choose Options from the followings:
Theory Class (Classroom-based learning)
On-Road Class (Practical/field training)
Start Date & End Date:
Defines the session’s duration (single day or multiple days).
Time Slot:
Dropdown with intervals for session length.
Occurrence:
All Weekday (Repeats every weekday)
Specific Weekday (Custom day selection)
Weekend (Saturday/Sunday)
Location: Physical venue name/address.
Map URL: Optional link to a map (e.g., Google Maps) for directions.
Instructors: Dropdown/search to assign trainers.
Students: Pre-filled or searchable list.
Save: Review all entered information for accuracy. Click “Save” to finalize the addition of the new student to the DriveEZ system.
1.5.1.3 View Invoice
This will allow users to view the invoices of the specific student.
The table lists will display invoice records with following columns.
Ref: A unique reference number for the invoice.
Amount: The total amount of the invoice.
Paid: The amount already paid.
Balance: The remaining amount to be paid.
Date: The date the invoice was issued.
View: A button or link to view the invoice details.
Delete: An icon for deleting the invoice.
1.5.1.4 View Payments
This will allow users to view payment tracking. The table records payment transactions, showing details which were made by the specific student.
The table lists will display Payment records with the following details:
Invoice: The linked invoice reference number.
Amount: The payment amount.
Date: The date the payment was processed.
Method: The payment gateway or method used.
Action: A symbol for additional actions like deleting the payment.
1.5.1.5 View Notes
This will allow users to view the student notes:
The table lists will display note records with the following details:
Category: Likely classifies notes by type.
Sent At: Expected to show the timestamp when the note was created or sent.
Note By: Would display the sender/author of the note.
Note To: Intended to list the recipient(s).
Note: The actual content or summary of the note.
Action:
1.5.1.6 View Documents
This will allow users to view and track the documents uploaded by the students.
The table lists will display Document records with the following details:
Name: To display the filename or document title.
Uploaded By: Intended to show the user or entity who uploaded the document
Date: Would list the upload date.
Action:
1.5.1.7 Right Sidebar (Student Profile Summary)
On the right sidebar users would be able to view student profile as following:
Display Name
First Name
Last Name
Email Address
Branch
Country
Province
Language
Mobile App
Active Status
1.5.1.8 Add Student
Locate and select the “Add Vehicle” button which is situated on the top right corner. You will be able to view the Form for new vehicle details.
Complete the student details:
First and Last Name: The student’s legal name.
Display Name (required for some fields)
Email Address: Used for login and notifications.
Password: Set an initial password for account access.
Phone Number and Address: Contact information.
Address: Add full details including Street number/name, Apartment number, city, province, postal code.
Emergency Contact Name: To include primary contacts
Pickup Location: To add pickup location
Zipcode: (appears twice, possibly for home and school locations)
Availability to Start Course (to schedule the student’s program)
Profile picture upload: Section for uploading a student photo
Video Tutorial
Scheduling
Clicking the calendar icon in the Action column on the Instructor Listing screen allows users to view the individual instructor’s schedule as shown below:
This interface enables administrators to view, manage, and take action on all schedules associated with the instructor. Each row represents an instructor and displays key information including:
Session Name: Name of the driving session
Dates: Date range for the session
Duration: Start and end time of session
Instructor: Instructor assigned
Class Type: On-Road or Theory
Created By: Who created the session (Instructor/Student)
Actions: View, Edit, Delete icons where applicable
1.3.1.1.2 Edit Schedules
This will allow users to Edit the schedules of the instructor. Below is a breakdown of its key functionalities:
Session Name: Name of the driving session
Class Type: selection between Theory Class (classroom-based learning) or On-Road Class (practical training)
Date and Time:
Start Date & End Date: Defines the session’s duration (here, a single day: 17 April, 2025).
Time Slot: Dropdown or input for session duration (e.g., 1.15 hour).
Occurrence (Required): Options to set recurrence:
All weekday (every weekday)
Specific weekday (user selects days, e.g., Thursday)
Weekend (Saturday/Sunday)
Checkboxes for manual day selection.
Location: Text field for the session’s location (e.g., India).
Map URL: An optional field to link to a map (e.g., Google Maps) for directions.
Instructors: Dropdown or search to assign an instructor (e.g., Test Inst Two).
Students: Field to enroll students (e.g., test paid fv—likely a placeholder).
Slots Detail (Summary): Displays a confirmation section with Date and Time Slot
1.3.1.1.3 Delete Schedules
Upon selecting the delete icon from the Action column they will be able to view the delete pop-up.
Yes: If you select yes from the pop-up the record will get deleted.
No: If you select No from the Pop-up the record will get deleted accordingly.
1.3.1.1.4 Export Options
Excel and CSV buttons allow exporting the branch data for offline use or reporting.
Video Tutorial
Communication Tools
Steps
On the DriveEZ dashboard, locate and select the “Communication Tools” option. This section facilitates direct messaging and notifications between staff, instructors, and students.
To Users
Option to communicate with individual users
Users will be able to view below details in the table format:
Receiver: Name and contact details of the message recipient.
Status + Date: Shows the timestamp of message attempt along with its delivery status:
Sent/Failed indicator
Mode (SMS/Email)
Message: Short preview or the actual message content.
Action: Read Message button lets you view the full message details.
To Branches
Option to communicate with company branches
Users will be able to view below details in the table format:
Receiver: Branch name and associated email ID.
Status + Date: Timestamp and delivery status:
Message: A preview or summary of the email content sent.
Action: Read Message button opens the full email content or thread.
1.6.1 Send SMS
Clicking the Send SMS button in the top right corner allows users to send SMS messages for communication with system users or stakeholders.
Recipient Dropdown: A dropdown menu allows the user to select from available recipients.
Message Text Area: The user is expected to type the SMS content here.
Send Button: When clicked, it will triggers validation (e.g., message not empty) and then sends the SMS to the selected recipient.
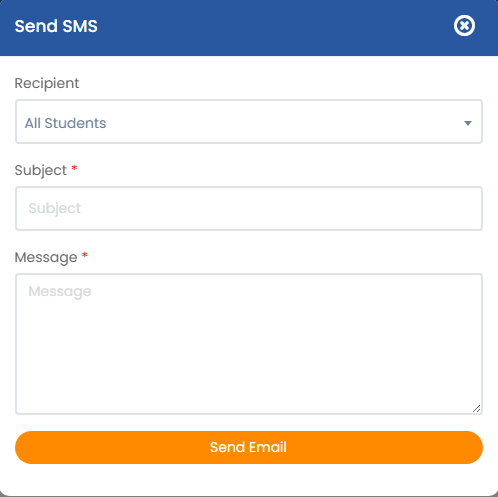
1.6.2 Send Email
Clicking the Send Email button in the top right corner allows users to send Email messages for communication with system users or stakeholders.
Recipient Dropdown: Allows the sender to select the intended group or individual recipients.
Subject Field: Captures the subject or title of the message. Essential for clarity, especially if this message is sent as an email or notification with a subject line.
Message Field: Used to compose the main content of the message to be sent.
Send Button: Triggers the message to be sent to the selected recipients. As per the label, it suggests that the message be sent via email, not SMS, which may require UI correction or clarification.